A green roof doesn’t maintain itself, no matter what the sales brochure promised. Whether you installed a simple sedum mat or a full-scale rooftop meadow, keeping it healthy requires consistent seasonal care, attention to drainage, and quick responses to small problems before they become structural headaches. The good news? Most maintenance tasks require no more skill than basic gardening, plus a willingness to work at height. This guide walks through what you need to know to keep your living roof thriving without calling in expensive specialists every few months.
Table of Contents
ToggleKey Takeaways
- Green roof maintenance is manageable with basic gardening skills but requires consistent seasonal care to prevent costly structural damage from drainage issues or membrane failures.
- Identify your green roof system type (extensive or intensive) and review original installation specs before performing any maintenance to avoid damaging waterproofing membranes or drainage outlets.
- Spring and summer care includes clearing debris, inspecting plant coverage, monitoring irrigation during heat waves, and removing invasive weeds before they damage the membrane.
- Fall and winter preparation focuses on cutting back perennials, clearing all gutters and drains to prevent ice-related stress, and checking for wind scour that exposes the growing medium.
- Inspect waterproofing membranes twice yearly for cracks, blistering, or separation, and use plywood walkways to prevent punctures—DIY repairs are only suitable for tiny punctures in non-critical areas.
- Monitor drainage after heavy rain to ensure water drains within 24–48 hours; standing water indicates clogs or a failing drainage layer that may require professional intervention.
Understanding Your Green Roof System Before You Begin
Before you touch a single plant, know which type of green roof you’re working with. Extensive systems (3–6 inches of growing medium) support drought-tolerant sedums, grasses, and mosses: they’re lightweight and low-maintenance. Intensive systems (8–24 inches or more) can handle shrubs, perennials, even small trees, but they demand irrigation, deeper root zones, and structural capacity to support the added load.
Check your original installation specs or as-builts. You need to know the waterproofing membrane type (single-ply TPO, EPDM, or built-up), the drainage layer (geocomposite mat, gravel, or modular trays), and whether your system includes an integrated irrigation network. This isn’t optional, you can damage a membrane if you dig too deep during weeding, or overload a drainage outlet if you don’t know its capacity.
Safety first: Green roofs are still roofs. Use fall protection (harness and anchor points) if the pitch exceeds 2:12 or the edge lacks adequate parapet height. Wet vegetation and saturated growing medium are slippery. Wear boots with good tread, work gloves, and keep tools tethered so they don’t slide off the edge.
If your roof was installed before 2020, review the original maintenance plan, requirements have evolved. Some older systems lacked root barriers or used inferior drainage fabrics that clog faster. Knowing your system’s age and configuration guides how aggressively you can maintain it.
Essential Green Roof Maintenance Tasks by Season
Spring and Summer Care
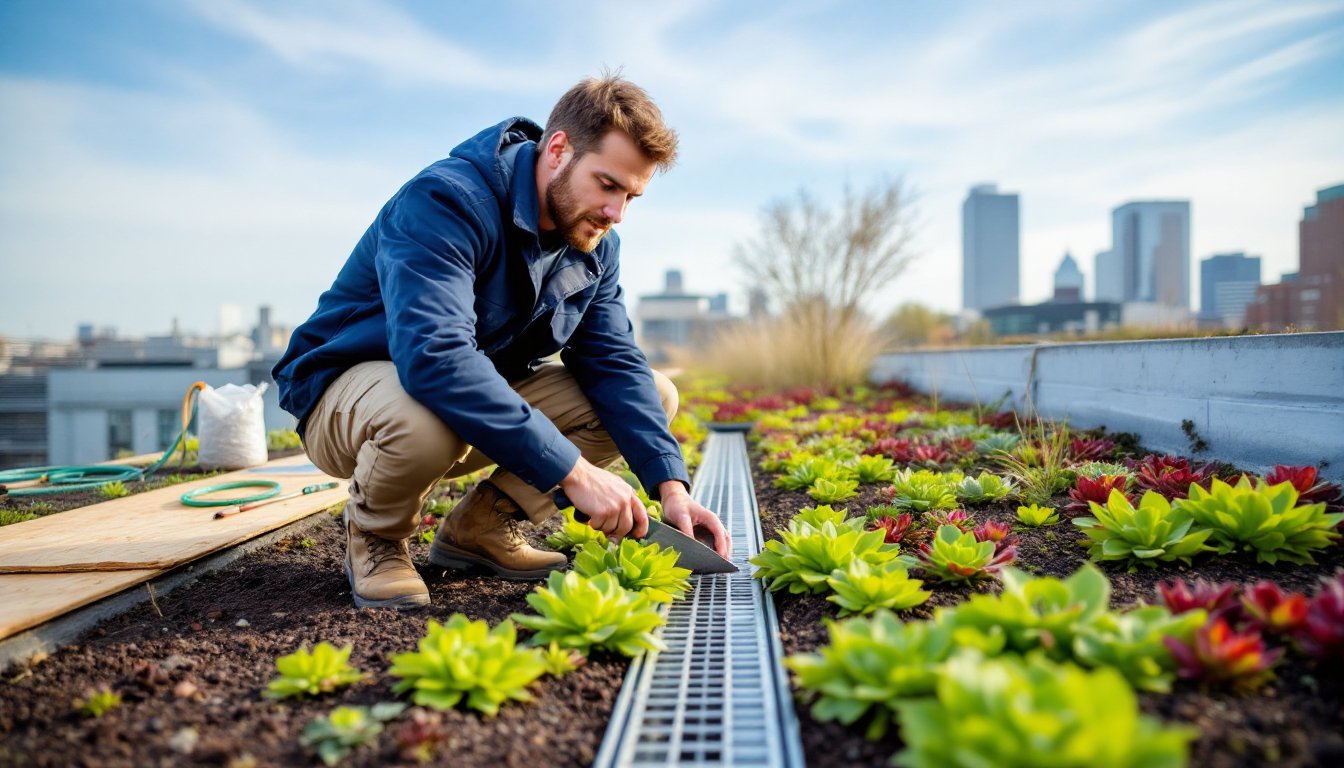
April through September is peak growing season, and peak work season. Start by clearing winter debris: dead leaves, broken branches, and any trash that blew onto the roof. Debris clogs scuppers and drains, so check those outlets first. Use a leaf rake or your hands: avoid metal tools near the membrane.
Inspect plant coverage. Bare patches signal erosion, pest damage, or poor drainage. If the growing medium has washed away, top-dress with lightweight engineered soil (not topsoil, it’s too heavy and compacts easily). Seed or plug bare spots with species that match your existing palette. For extensive roofs, Sedum album, Sedum acre, and native grasses like Schizachyrium scoparium establish quickly.
Fertilize sparingly. Most extensive green roofs thrive on neglect, but intensive plantings benefit from a slow-release granular fertilizer (5-10-5 NPK ratio) applied once in late April. Avoid high-nitrogen formulas, they encourage lush growth that demands more water and increases weight.
Monitor irrigation during heat waves. Even drought-tolerant sedums wilt when temperatures push past 95°F for multiple days. Check that drip emitters or spray heads aren’t clogged, and adjust run times if plants show stress. Mid-summer is also when invasive species appear, more on that below.
Fall and Winter Preparation
October and November are for cleanup and winterization. Cut back any perennials to 3–4 inches: leave sedum foliage in place to insulate roots. Remove annual weeds before they set seed. This is your last chance to address drainage issues before freeze-thaw cycles make them worse.
Clear all gutters, scuppers, and overflow drains. A single blocked outlet can pond water, which freezes, expands, and stresses the waterproofing membrane. If your system has removable drain guards, pull and clean them.
Inspect for wind scour, exposed corners and edges where growing medium has blown away. Secure it with erosion control fabric or temporary windbreaks until spring. Some northern climates see advantage in spreading a thin layer of compost (¼ inch) as mulch: it insulates roots and breaks down by spring.
Winter itself is mostly dormant, but after heavy snow or ice events, check that meltwater is draining properly. Ice dams on green roofs are rare but possible if gutters freeze. Don’t use salt or chemical de-icers, they’ll damage plants and leach into the drainage layer.
Irrigation and Drainage Management
Even if your green roof was sold as “self-sustaining,” most systems need supplemental water during establishment (first two years) and during droughts. Drip irrigation is the most efficient option, it delivers water at the root zone with minimal evaporation. Check emitters monthly: mineral deposits and algae clog them.
If you don’t have built-in irrigation, use a garden hose with a wand or sprinkler. Water deeply but infrequently, once every 10–14 days in summer for extensive roofs, more often for intensive plantings. Early morning watering reduces evaporation and fungal growth. Avoid watering in late afternoon: wet foliage overnight invites disease.
Drainage problems show up as ponding, soggy spots, or wilting plants in areas that should be moist. Walk the roof after a heavy rain. Water should drain within 24–48 hours. If it doesn’t, you’ve got a clog or a low spot.
Start by clearing visible debris from scuppers and checking that downspouts aren’t blocked below roof level. If the problem persists, the issue is usually in the drainage layer, either the filter fabric is clogged or the drainage mat has compressed. This requires carefully lifting sections of growing medium and vegetation to access and replace the fabric. That’s a two-person job. If you’re not comfortable with it, call a green roof specialist or a roofer experienced with vegetated systems, as outlined in professional guides like those from green roof hardscaping resources.
In winter, make sure roof drains are clear of ice. A freeze can crack drainage pipes if water backs up.
Plant Health: Weeding, Pruning, and Replacement
Weeding is your most frequent task. Wind-borne seeds, maple, dandelion, thistle, germinate fast in green roof media. Pull them when small, before roots reach the waterproofing membrane. Wear nitrile gloves and use a hori-hori knife or hand trowel to loosen stubborn roots. Never dig deeper than the root barrier (typically 2–3 inches below the media surface).
Watch for woody invaders: tree seedlings (especially maple and ailanthus) will punch through membranes if left unchecked. Remove them immediately, roots and all. For persistent perennial weeds, spot-treat with glyphosate only if your roof spec allows herbicides, some green roof warranties prohibit them. When in doubt, hand-pull.
Pruning keeps intensive plantings tidy and prevents overgrowth that shades out lower plants. Use bypass hand pruners for stems up to ½ inch, loppers for anything larger. Don’t let clippings accumulate on the roof, they smother plants and clog drains. Bag and compost them or dispose per local yard waste rules.
Plant replacement happens. Harsh winters, summer droughts, or pest outbreaks can thin your plant cover. Replant in spring or early fall when roots establish fastest. Match the original species if possible: mixing incompatible plants (aggressive spreaders with slow growers) leads to bare spots. For extensive roofs, consider pre-vegetated mats or plug trays from suppliers specializing in green roof plants.
Check for pest and disease issues. Aphids and spider mites appear on stressed plants. Spray them off with water or use insecticidal soap. Fungal problems (powdery mildew, rust) signal poor air circulation or excess moisture, increase plant spacing and reduce irrigation frequency. For comprehensive guides on plant care techniques and troubleshooting, home gardening experts offer detailed advice that applies to green roof plantings as well.
Inspecting Waterproofing Membranes and Structural Components
This is the high-stakes part of green roof maintenance. A punctured membrane doesn’t announce itself until you have a leak in the ceiling below, and by then, repair costs have ballooned.
Twice a year (spring and fall), visually inspect all exposed membrane areas: around drains, penetrations (vents, HVAC equipment), and roof edges. Look for cracks, blistering, or separation at seams. If you see any, document with photos and call a licensed roofing contractor experienced with vegetated assemblies. DIY membrane repair is possible with peel-and-stick flashing tape, but only for tiny punctures in non-critical areas. Structural waterproofing is not a YouTube project.
Check flashings where the roof meets parapets or walls. These should be secure and sealed. Loose metal flashing can slice the membrane during wind events. Reseal with a compatible elastomeric sealant (polyurethane or silicone, depending on the membrane type).
Inspect the structural deck from below if you have access. Look for water stains, sagging, or mold on ceiling surfaces. Green roofs add significant dead load, 150–200 pounds per square foot (psf) for intensive systems when saturated. If you notice deflection or cracking in the structure, consult a structural engineer immediately. This isn’t covered under DIY.
For deeper technical insight into structural considerations and advanced building practices, many contractors reference building science publications that cover load-bearing requirements and envelope detailing.
Safety note: Never walk directly on exposed waterproofing membranes. Use plywood walkways or work from surrounding vegetated areas to distribute your weight. Punctures often happen during maintenance, not installation.